

"CollageIt is a very nice and useful photo collage utility."
- Soft32
" It's a great photo collage software! A very, very fast and simple photo editor."
- Benjamin Glettenberg
Launch the CollageIt and get started making the collage.
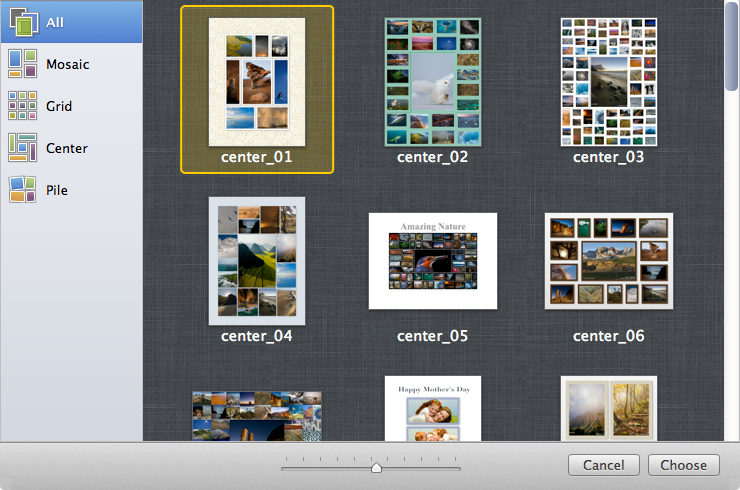
Choose a template from the 4 different styles of templates including Mosaic, Grid, Center and Pile, which covers 30+ templates in total.
Click “+” button to browse and select the photos you want to use.
Change the page size of your collage by clicking the Page Setup button.
Fill the background of your collage with color or image by clicking the Background button.
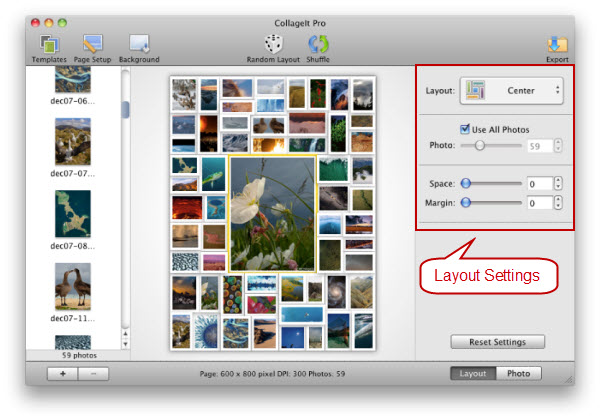
Switch to the Layout tab.
Choose one collage layout among the 4 predesigned styles including Mosaic, Grid, Center and Pile.
Set various parameters like the photo space, page margin, photo rotation and so on to change the layout of collage.

Switch to the Photo tab.
Drag the slider or input the values to change the photo border and shadow.
Click Random Layout button to get a different collage layout.
Click Shuffle to randomly reorder the photos.
Grab a photo and use Drag & Drop to move the photo to a new frame.
Crop photos by double clicking the individual image to get your ideal clipping.
Click Export button to output your collage with 4 methods:
Save the custom photo collage as an image in various image formats with high quality.
Send collage via E-Mail to share with your friends and families.
Set it as your desktop wallpaper.
Save it as a PDF file.