

"CollageIt is a very nice and useful photo collage utility."
- Soft32
" It's a great photo collage software! A very, very fast and simple photo editor."
- Benjamin Glettenberg
CollageIt enables you to create good-looking collages without a lot of hassle. When you are making the collage, setting the page size and background is essential, for sometimes you need to make collage in different sizes for various uses, and the background settings give more effects on collage. In this tutorial, you will learn how to set page size and create the background for your photo collage you are working on.
Launch the application CollageIt then you need to choose one template to make your collage. To get started, you will need to make sure you already have your photos in the left panel that you want to use, when your photos are loaded, it’s time to set the page size of the collage.
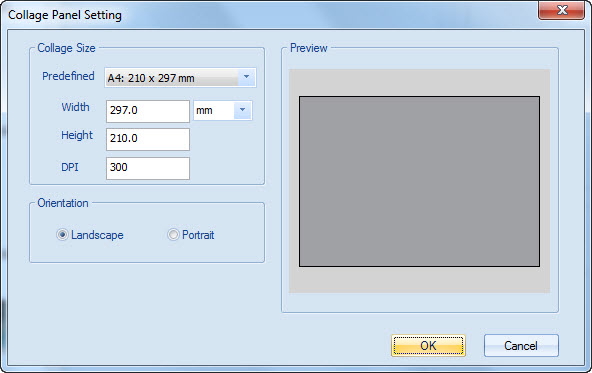
Click Page Setup button below the window to change the collage size, then the Collage Panel Setting window opens.
Now you are going to make general settings for your collage. Go to Collage Size tab, this application provides some commonly used page sizes that are predefined for you to choose, available for selection are A4, A3, A2, A1, desktop wallpaper size, scrapbook, greeting card and so on. If you select Customize, you can set the paper size by inputting the width, the height and DPI values.
In the Orientation tab, choose Portrait or Landscape as the orientation of your collage.
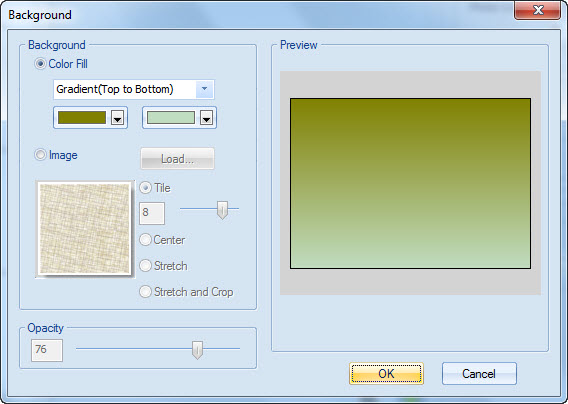
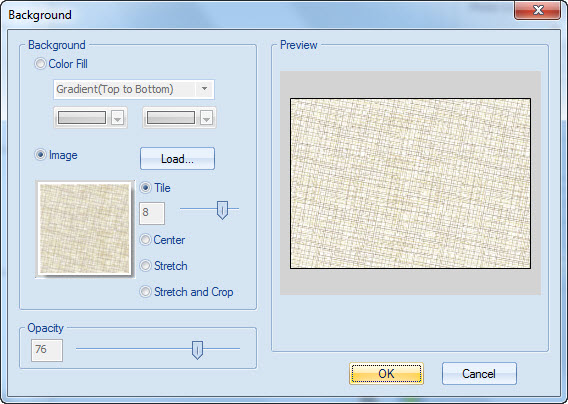
And then we can set background by Clicking Background button at the bottom side of the application, then a new screen pops up, here it is possible to use a gradient, solid fill or an individual image as a background.
Check Color Fill option, you can use a gradient fill (top to bottom or left to right) or you can use a solid fill. Another way is image fill, check Image option and then load one image that you feel well, the way of image background you can select like Tile, Center, Stretch, Stretch and Crop option.
If you use an image as background, you can set the opacity of it in Opacity tap, when you are finished hit the OKbutton.
You can create collage with new design in Layout tab, set the photo space, page margin, auto rotation mode and sparse mode and that will make the collage look unique and fresh. After finished, click Random Layout button and Shuffle button to preview the collage and get the best results.
When you are happy with your collage, click Export button to save the custom photo collage as an image so that you can send it to your friends and families via email, hang it on the wall as a poster, upload it to your blog or the image hosting site.